Showing posts with label brands. Show all posts

Wednesday, December 11, 2013

Shopping & Tea

Jo was in town last week so I took the opportunity to catch up with her and to also finally try out this amazing cafe I had heard of for months called, Antoinette Cafe.

Food! Glorious Food!!!!! We were quite full so we decided to share our food, but we didn't realise the portions were gonna be this huge! We shared Honey Baked Ham sandwich that came with super crisp Honey Mustard chips, Crepe with Parma ham, egg and cheese and topped with fresh salad, French style fluffy pancake with Strawberry compote and whipped cream. I also had a pot of Earl Grey d'Antoinette, which was quite light and sweet unlike conventional earl grey teas.

We did some some window shopping after the tea and we wandered into Topshop to have a look. Found some uh... shall we say... interesting(?) clothes from a collection they did with some designer.  Jo and I decided to try some of the dresses from the collection just for the fun of it.

Some Nightie looking dress. Looks pretty decent and might look good with some proper styling

A tunic/top with a crazy print of eyes and hearts. It looks like some kinda disease to me to be honest, or maybe because I detest red dots a lot. 

Some kinda frilly top/tunic, I know it'll probably look good if done some styling a la cult party style, but for now, it just looks like I'm wearing an oversized baby dress

Jo trying out this over the top frilly jacket that cost.... wait for it.... $500!!!! Technically $499 but still!!! It is pretty in it's own way, unfortunately the picture doesn't show just how tacky shiny it is, though I am kinda starting to like it the more I stare at the pic hahaha

Walked around the new Robinsons Building, previously known as Heeren. The whole place is completely different now and though I miss Heeren being a youth hangout zone, it is refreshing to see some life brought back to the building with the knocking down of walls and installing new floor layouts and light fixtures. Took this picture from the 3rd floor of the building as I was looking down at the snow globe installation.

Outfit that day:
Jacket: Jouetie
My Little Pony Shirt: stall at cosplay event
Lace Shorts: Heather
Lace trimmed floral print Socks: Daiso
Shoes: Jeffrey Campbell
Choker: JRunway
Bag: Lip Service 

Work is robbing me of brain power and will to blog once again. I'm just tired every time I reach home and I now wind up eating dinner and then zoning out in front of my laptop, even editing my cosplay pictures seem like such a monumental task now. Even so, I will still update the blog, I just pray you'll be patient with my slow uploads.

Sunday, August 18, 2013

Makeup Kit for the Makeup Virgin

I still remember when I fell head first into my love of makeup at the tender age of 16, I had just finished secondary school and was hoping for an image change when I started in my new school especially when I had been a total nerd back then. I didn't have a clue bout makeup, my mom refused to help me and there weren't many makeup gurus on Youtube back then. I ended up experimenting alot with drugstore makeup but eventually, I learnt what worked for me and what didn't. Knowing the awkwardness and fear of being in aisles full of makeup and not wanting to appear dumb to the snooty makeup counter girls, here's my take on a beginner's makeup kit for the makeup virgin:

1. Concealer & Foundation

The most tricky but the most important makeup to me. I recommend using powder foundation for beginners, because there is less chance of having to deal with a mess and having to feel sticky and oily when using liquid or cream foundations. I wouldn't reccomend BB cream as the shades are limited and often do not conceal blemishes as much as I would like. Try getting a liquid or cream concealer from the same brand as your beginning foundation and dab it gently with your fingers or a triangle sponge on the area you want to conceal, then gently dab the powder foundation all over the concealed area trying not to remove the concealer as much as possible before applying on the rest of your face.

The trick to finding the right shade is to apply a streak right on your jawline, if you can't see the colour, it's the perfect shade for you.

2. Eyebrow Pencil

Never use black eyebrow colour! It looks too harsh on your face and too fake, always use a dark brown shade if your hair is dark and go lighter if your hair colour gets lighter. The easiest method to colour your brows is to use a pencil and gently shade it into you existing eyebrow shape. It'll be alot easier if you get your brows professionally shaped first, alot of manicure places do it for like $10 or so, it hurts when you tweeze your brows but the pain is well worth it because you get slower regrowth.  

Personally, I recommend the eyebrow pencils from Canmake, these retractable brow pencils do not even require sharpening. Just remember to brush the colour and use small, light strokes to achieve the most natural look, you do not want to look like you just used a crayon on your brows.  


 3. Neutral Eyeshadow Palette

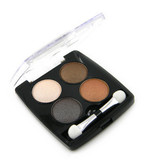
The easiest colours to begin with are the brown/beige palettes, they're great for achieving natural looks or even darker, smoky looks if you use more colour. You can always experiment with them and brown suits most occasions (you wouldn't wanna wear glittery blue to a serious event right?). Most drugstore brands have a wide array of brown palettes, I personally adore Kate's. However, the best bargain find I've ever gotten was a Daiso eyeshadow palette, I know it sounds iffy but its seriously great for it's price of only $2! I use this 4 colour palette, but they have other choices depending on their shipment


4. Eyeliner

For beginners, the easiest eyeliner is the pencil version. Simply close your eye and gently pull your eyelid straight sideways, then go along the lashline with your eyeliner. Once you get the hang of it, you can always move onto gel or liquid liners for a different look. Black is a favourite colour but brown is more forgiving as any mess you make is less obvious, the choice is really up to you.

I reccomend Sana Super Quick slated pencil liner. It's a dark black, doesn't smudge easily, retractable without needing you to sharpen it and best of all, it's slanted on an angle making it easier for you to draw your eyeliner.


5. Eyelash Curler

Hold the lash curler as close to the base of your lashes without actually hurting your eyelid and gently squeeze and hold for about 10 seconds. The most natural curl I've achieved was by holding and curling the lashes in 3 sections (base, middle and close to the tips) for 10 seconds each but it's really time-consuming to do it. As much as I will like to recommend a drugstore version of a lash curler, I'm afraid I'm too used to Shu Uemura's version as I've been a fan of their lash curler for years. At $30++ for one, it isn't cheap, but it's a definite investment that lasts for years. However, if you're a poor student like how I was when I started out, you can always experiment with Daiso versions or brandless ones from the drugstore.


6. Mascara

After curling your lashes, quickly brush on your mascara to retain the curl of your lashes for an eye-opening effect. Brush on just enough to coat your lashes but don't go crazy and wind up with spider leg lashes, it isn't pretty. Also remember to let the mascara dry before deciding to close to your eyes tightly as you might wind up with panda eyes.

Recommendation is Deja vu's mascara, they have the Lash Knockout version for a thickening effect or the Fiberwig version for a lengthening effect. It depends on what effect you are looking for or you could also combine the two for a really intense look! Just remember to let the first layer of mascara dry first before applying the next layer, this will prevent clumping. Deja vu mascaras are also easy to remove, just apply running warm water and rub alittle bit, the mascara comes right off!

7. Blush

Gently pinch your cheeks till you see the colour on your cheeks. That's the most ideal shade of blush for you but the general rule is that pinks look better on fairer skin while orange tones look better on tanned skin. The trick is to add a natural glow to your face and bring back some colour after applying foundation. Powder blush is the easiest to control, just swirl a large blush brush in the colour and apply on the apples of your cheeks (smile and the curves you see on your cheeks are the apples), apply in a gentle sweeping motion in a "C" shape towards the sides of your forehead, but make sure most of the colour wind up on your cheeks not your forehead!

Cheap but good, Majolica Majorca's Puff de Cheek range maybe limited edition but I've seen quite a few stores still stocking them. Their colours suit most skintones and if you're really unsure, just use the peach tone as it's a nice cross between orange and pink, plus who can resist those adorable tins?

8. Tinted Lipbalm

 A multi-purpose item, it will help you moisturise your lips (chapped lips are not a good look) while adding colour. As a tinted lipblam you get more bang for your buck and alot of drugstore brands are now producing tinted lipbalms in a variety of colours to suit your skintone and preferences. 

I started by using a tinted Nivea lipbalm and it served me well for a few months before I decided to move onto proper lipstick and glosses, you could try Nivea's pearly shine lipbalm. It's moisturising, adds some colour and with the hint of shine, you'll look like you've also applied a hint of gloss.

9. Makeup Brush

The most basic brush to start with is a large blush brush, it can be used to not only apply blush but also for your powder foundation if you prefer a more natural look. Synthetic hair is alot cheaper then real hair and of course suitable for you if you're into the whole "save the animals" thing. Natural hair does last longer and is immensely softer then synthetic but I personally find synthetic to be more then adequate for most of my makeup needs.

The best beginner's makeup brush is Body Shop's blush brush and not the retractable version. Get the original as the hairs are more spread out resulting in better application while the portable, retractable version tends to get alittle splotchy as the hairs are pressed closer together. 


The trick to starting with makeup is to try and look like a better version of you and not some whacked out celeb wannabe. Once you've got the basics of application down, you can always move onto more challenging makeup such as contouring and applying fake lashes. Makeup takes practise and I find it easier to learn by reading magazines though many of my friends often watch makeup gurus on Youtube.

Just remember that makeup is meant to be fun so don't forget to experiment some times and also good makeup starts with great skin, so don't forget to take care of your skin.

Monday, April 8, 2013

Chanel Nail Polish Review

Chanel nail polishes are my recent obsession and I've been in love from the very first stroke of the brush.

May was my very first Chanel polish and I actually bought it at the spur of the moment whilst looking for my perfect nude polish (I've yet to find it). It's a very sweet pink that's not too glaring, it reminds me of the sweet colours that Rinka likes to wear.

Jo helped me to get this Peche Nacree shade during her last visit to Singapore. True to it's name, it's a subtle peach shade that goes with anything.

Rose Cache was another shade that Jo helped me get, I was alittle apprehensive abotu the colour as it appeared darker then what I thought, but after application I changed my mind. It's an elegant understated darker nude, almost tan shade.

The three current shades that I have in my collection.

Colour: true to the bottle, it require only one coat for the colour to cover the nails but I apply two coats for a stronger colour

Ease of Use: The brush was large enough to cover most of my nails, the mixture wasn't too thick and streaking was minimal, I could even apply without paying close attention and there wouldn't be much streaking

Drying time: Dries insanely fast!! From starting with my base coat to the final top coat, it takes only roughly a half hour to dry. This is perhaps one of the greatest perks for me especially now that I'm quite strapped for time.

Packaging: Elegant and instantly recognisable with the Chanel logo on top of the cap and splashed across the front in large bold lettering, the top cap pops open to reveal the smaller brush that is also embossed with the Chanel logo.

Lasting Ability: The shortest time before chipping was about 4-5 days and that was after opening mutiple drink cans, the longest was slightly over a week though I could see cracks forming but it wasn't visible from far.

This is perhaps the only polish I'm using currently, the colours are suited for my office within a corporate environment. Now that I'm constantly meeting clients, I doubt it's appropriate to show up with bright, flashy colours or with chunks of glitter, these colours make me feel professional and pretty at the same time. 

I plan to add more colours into my collection and am currently eyeing a colour, specifically, Majesty. I also managed to get another colour Fracs, which I just managed to paint on, hence no picture, but you can see it on my Instagram. I'm also still looking out for my perfect nude nail polish, I plan to try out Estee Lauder's new nude collection but does anyone have any reccomendation? 
                          

Saturday, March 30, 2013

Recent Clothes, Shoes & Accessories Haul

In my quest to change my wardrobe, I've been doing plenty of shopping lately. I've kind of split my wardrobe into 3 sections so far, office, casual & dress-up. Dress-up is more of my cult party kind of influenced look as it's been the most inspiring to me thus far. Lets take a look at what I got so far:  

Patent leather pumps with patent leather and metal ribbon detailing on the front. From Itti & Otto, these shoes weren't cheap at $89.90 but I snagged them at a 15% off sale so only got them for $76++! These are my investment shoes for the office and they've been worth every cent so far, as they're super comfy and look great

Taobao haul consisting of pink streaked wig, creepers, two cross necklaces, circular sunglasses, velvet hair band and velvet choker

Was surprised that the choker has the word "Alice" engraved on it, i had assumed it was gonna be a plain pendant

Also grabbed these Grimoire verum inspired stockings

After searching like crazy, I managed to hunt down this special RinkaXSweet shirt that Rinka had sold to gather funds for the flood victims, I didn't manage to get my hands on it earlier as it sold out almost instantly but now, it's finally in my hands! Though my larger bust size doesn't quite agree with it as much as I would like it to. Also bought a Lowry's Farm pleated maxi skirt

One of my favourite buys, this lovely Jouetie baseball jacket, made with a silky satin material. It's surprisingly warm but fits me so well.

LOL check out the Engrish

After intensively trawling the Internet, I finally got my hands on these babies. The Jeffrey Campbell Skate shoes.

Just look at the amazing wooden carved heel!! I feel like I'm wearing an elegant scupture on my feet and it's more stable then I had expected. I'm trying to convince Steph to get a black pair so that we can be shoe twins!

In case anyone's wondering how the wig looks like, this was the picture shown on the website. It's actually inspired by Amo's pink hair and it reminds me of my old faded pink hair that I love so much

Last but not least, a lace dress that will probably be the main skeleton for my new look and a purple cardigan, both from Cotton On. The dress was on sale from $39.90 to $19.90, score!!

I'm already feeling excited to try out some outfits I have in mind but I'll probably buy a few more accessories to spice things up, I really want a few rosettes and I might get a bag too. Hopefully my new look will go the way I hope it will because I'm starting to feel excited and inspired about fashion once again, a feeling that I thought I had lost awhile back. So hope my dear readers are excited to see my new outfits

Sunday, March 3, 2013

Personal Outfit (Hello, Shibuyas Tokyo Fashion Show)

I managed to score 2 invites to the Hello, Shibuya Tokyo private fashion show, so naturally I grabbed Steph to be my plus one for it. The show was held at Red Dot Design Museum and the size was perfect for the event as it wasn't too large, just small and cozy enough but still had enough space for a catwalk and ample leg room for everyone watching. The designers showcased that evening were very avant-garde and incredibly mind-blowing, I'm still replaying that evening's show in my head.
We had wanted to wait for the professional pictures of the show to be released before posting bout it on our respective blogs, but since they're being impossibly slow with it, we decided to just blog it anyway.

The slogan wall to pose at, the photographer took a picture of us but we haven't seen it surface yet.
Took our seats and waited for the show to start

All the beautiful, cool and funky people slowly streaming in


I forgot to bring my camera, so I tried to take shots of the show with my Iphone, but the lights were too glaring and there's only so much a phone camera can capture, so I gave up after a few shots.

The only professional shot that's been released and my favourite brand of the night. I love how the designer used black light to show off the cage dresses

This was also the first show I've been to where the designer was actually present to take a bow after his/her designs had been paraded before us. It felt good to clap enthusiatically to show just how appreciative I was of being able to see their amazing work.

I rushed down to the event after a tiring day of work and having to be part of a work event where we had to schmooze with the bigshots of the company so pardon my terribly tired face and lack of a good outfit, I tried going mode since it's the only style that's appropriate for the office and fashion show.
Shirt: Emoda
Belt: Borrowed from Mom
Skirt: 2nd-hand from Mom
Heels: Charles & keith
Bag: Jimmy Choo

Wore my vintage mechanical men's watch with open face, I love looking at the machinery in a watch
Also wore my new pinky ring from JRunway, not sure what brand is it from but probably Osewaya. I know it's bit hard to see but it looks like 2 hearts entwined together with 2 diamante 

Makeup for the evening, I touched up my base and applied my lashes and a darker lipstick on my way to the event LOL

With the ever gorgeous Steph, her red hair is simply WOW!

Friday, January 18, 2013

My Makeup Bags (Work Bag, Fun Bag & Cosplay Bag)

My makeup bags are constant companions that I make sure to bring along with me where ever I go. They're the main reasons why I can never simply carry a tiny purse that can only contain a credit card and some cash, I use bags that are so big that I could probably fit an entire kitchen sink in nd most of the time, my makeup bags take up about 1/4 of the available space.

My makeup bags are split into 3 varying versions, depending on the activity of the day. I also tend to pack them the day before or after I've applied my makeup, just to ensure that my lashes don't end up flying off or to touch up my lip gloss and stuff. So Let's take a closer look at them:     

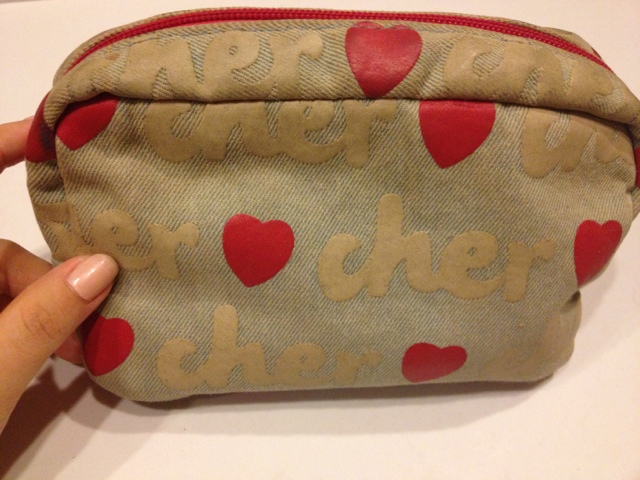
This ws my old makeup bag which I got from the Cher brand mook bout 2 years back. It's certainly been through alot as the colour was a much brighter blue, the inner lining is also starting to tear, so I knew it was time to move onto another bag  

This is the fun/play bag, tthe one I take out when I'm shopping and stuff. The bag is Cecil Mcbee and it usually contains things to simply touch up for the day:
lash case with glue (case from Muji)
Gatsby oil absorbant facial wipes
Lip gloss (current favourite is from Elf brand)
Lipstick (current favourite is this limited edition shade from Anna Sui)
Palgangtong Loose powder
Pocket mirror (Gift from Steph from the Egg Store in Japan)
This is my Marc by Marc Jacobs work bag, which usually contains my entire kit for my basic neutral makeup as I've overslept a few times and had to apply my makeup on the run. This bag is good to simply grab and go and I can apply everything within 10 minutes flat. This bag usually contains:
Covermark cream concealer
Gatsby oil absorbant facial paper
Cezanne powder foundation
Sephora highlighter/under-eye concealer
Kate brow mascara
Heroine Make Impact frame & Curl mascara
Sana Super Quick eyeliner
Majolica Majorca Blood On lip & cheek tint
Korres lip balm stick
Elf lipgloss
Palgangtong loose powder
Mini Burberry Brit perfume
makeup remover stick (was a non branded $2 lucky find)
Pocket mirror from Egg Store


My last makeup bag or should I say bags, are these Anna Sui bags that contain everything I could possibly need for my cosplay. The larger bag is A4 in size so it's pretty roomy

The smaller bag usually contains my base items like primer, foundation and stuff. I try not to bring it along to minimise the amount of stuff I bring to events or shoots but sometimes I wind up short on time to apply my base makeup. The larger bag contains everything I will need for the cosplay look for the day including bronzer, highlighter, eyelid tape, an assortment of eyeshadows that change depending on the character I'm doing and an assortment of makeup brushes. I also make sure I bring along my handy Franc franc mirror and sandwich it between the bag to make sure it doesn't break during transportation.

 As you can see, I try to minimise the amount of things I bring along with the exception of my cosplay bag. From the above pictures, you could probably see what are my current makeup essentials haha.

_______________________________________________________________________

 
On a personal note, I've quit my job. I won't go into details as there were a variety of reasons that made me choose to leave, but as people say, when one door closes another opens. So I'm looking forward to moving onto bigger and brighter things in my life. I feel like 2013 is a year of change for me, so far I'm trying to maintain my happy notes jar (I put in little notes of what things that made me happy on a daily basis) and now I'm trying The Secret method of reaffirmation and telling the Universe what I want by writing it 10 times a day. I know it sounds bit out there but there's no harm trying and I find it useful in reminding myself on what is my current goal.

So let's just see where life takes me 

Sunday, December 23, 2012

Meet Up with Steph

Had a bad day at work last Friday, so bad that I was kinda miffed bout it through the whole weekend, though I know holding onto such negative emotions does nothing but bad things to you. So I asked Steph out just to chill and shop abit to get my mind off things.

I decided to doll up too, so that I'll put my mind into a good vibe. It certainly worked because I felt like my old self once more after my makeup and hair was done. 

 After make and hair. Steph says my hair is fine but I just felt like it wasn't as good as how I used to do it, perhaps its the way I curled or I'm due for a haircut pretty soon.

 Outfit:
Dress: Bought in Macau
Military jacket: Topshop
Stockings: I've forgotten
Beret: Accessorize
Shoes: Gal Star
Bag: Snidel

We went to JRunway because despite being open for so long, and me being into Japanese fashion, I've yet to set foot into that store. It's pretty cool since they had brands like Emoda, Algonquins, Spiral Girl etc.

Found these d.i.a. style shorts on a rack, they were so tacky with the buckles that they actually looked good ROFL. Steph tried and eventually bought the  black version while I tried the blue version. I qite liked it but at $75, its kinda steep especially when I'm not so much into the hardcore d.i.a. style

Bought this Mystic cardigan. It was placed along the sales rack so its a steal compared to its previous price. The wool is alittle rough but I like the fit and considering my size, I find it difficult to find good wool and knit cardigans that fit my frame.

Bought these rings too. I'm in love with the vintage style one on the left. My tastes have been geared more towards a much softer feminine style lately. The stacked rings on the right were really pretty and I like how they can be stacked together for a more dramatic look or worn seperately. Sadly one of the diamante on the stacked rings has dropped off, so I brought it back to be exchanged.
 I chose this 3-way hair accessory in its place. All 3 can be worn together as they're linked by the chain, or be worn separately with the chain becoming a really cute bracelet.

 Loved the details on the back of Steph's blazer. The pleats are such a cute addition

It started to pour heavily after wandering around JRunway, so we explored the new section of Plaza Singapura. We stumbled upon Tally Weijl , a high street brand popular with alot of Swedish bloggers. They had some cool stuff, so I may return to check it out once again.


Took this picture of us while we were waiting for our dinner and the Bf to arrive

It was also the first time that Steph and the Bf met each other in real life despite chatting online at times. It was interesting to watch them talk non-stop about games especially Nintendo stuffs.

The week is certainly flying by rather fast. I hope 2013 will be a better year for me especially on the job front. In the mean time, Merry Christmas to all my readers!